How to Clean Cat Ears Safely at Home best guide 2026
How to Clean Cat Ears Safely at Home best guide 2026
Table of Contents
How to Clean Cat Ears Safely at Home
Introduction
Did you know that approximately 20% of cats will experience ear problems during their lifetime, yet most cat owners overlook ear cleaning as part of their regular grooming routine? Understanding how to clean cat ears properly can prevent infections, ear mites, and discomfort that may lead to behavioral changes in your feline companion. Many cat parents feel intimidated by the process, fearing they might hurt their pet or cause unnecessary stress. However, with the right approach, tools, and knowledge, ear cleaning can become a simple, bonding experience that keeps your cat healthy and happy. This comprehensive guide will walk you through everything you need to know about safe and effective cat ear care,
Cat Supplies & Essentials
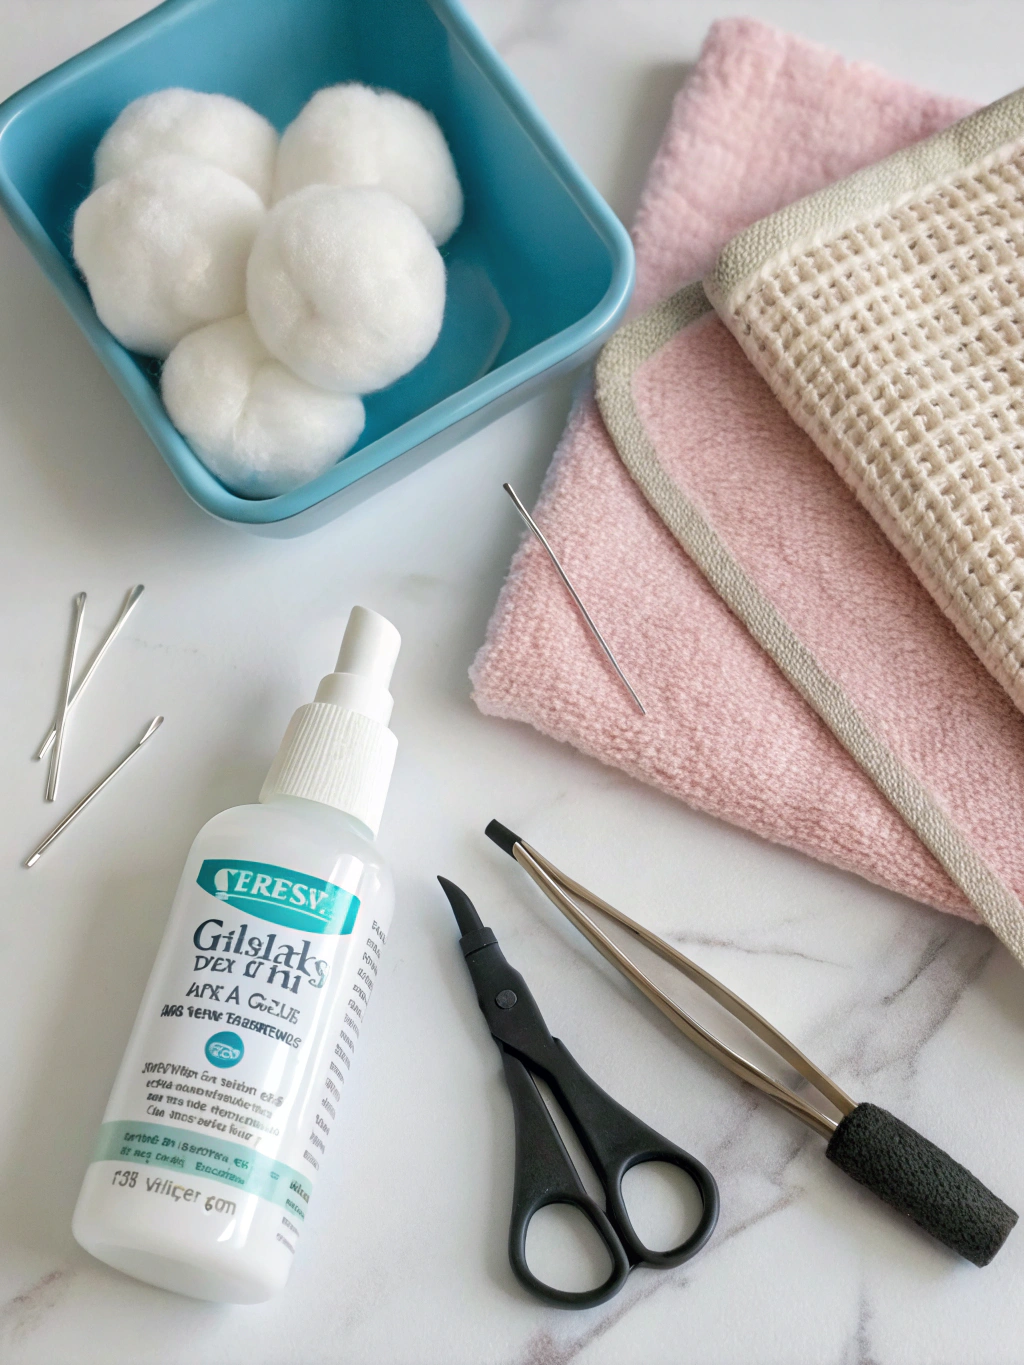
Before you begin cleaning your cat’s ears, gathering the right supplies is crucial for a smooth, stress-free experience. Here’s what you’ll need:
Veterinary-Approved Ear Cleaning Solution: Never use water, hydrogen peroxide, or alcohol. These can irritate the delicate ear canal. Choose pH-balanced solutions specifically formulated for cats, available at pet stores or through your veterinarian.
Cotton Balls or Gauze Pads: Soft, absorbent materials help remove debris and excess solution without scratching the ear canal. Avoid cotton swabs (Q-tips) as they can push wax deeper or damage the eardrum.
Treats and Rewards: High-value treats keep your cat motivated and create positive associations with ear cleaning sessions.
Towel or Blanket: A soft towel helps secure your cat gently if needed and protects your lap from any solution that might drip.
Flashlight or Headlamp: Good lighting allows you to see inside the ear and identify any concerning issues like redness, discharge, or parasites.
Optional Items: Cat-calming pheromone spray, a helper to gently restrain your cat, or a grooming table to elevate your cat to a comfortable working height.
Substitutions: If commercial ear cleaner isn’t available temporarily, consult your vet about safe alternatives, though specialized products are always preferred for optimal safety and effectiveness.
Timeline / Progress Expectations
Understanding the timeframe for successful ear cleaning routines helps set realistic expectations:
First Cleaning Session (Week 1): Your initial attempt may take 15-20 minutes as your cat adjusts to the process. Focus on positive associations rather than completing a thorough cleaning.
Weeks 2-4: Most cats become more comfortable with handling, reducing cleaning time to 5-10 minutes per session. You’ll notice improved cooperation as trust builds.
Monthly Maintenance: Once established, routine ear checks should occur weekly (just looking), with actual cleaning needed only every 2-4 weeks for most cats, unless your veterinarian recommends otherwise.
Cats with Chronic Issues: Felines with allergies, ear mites, or chronic infections may require weekly or bi-weekly cleanings as prescribed by your vet, with noticeable improvements typically appearing within 2-3 weeks of consistent treatment.
Seasonal Considerations: Spring and summer may require more frequent checks due to increased outdoor allergens and parasite activity.
Step-by-Step Instructions
Step 1: Choose the Right Time and Environment
Select a quiet moment when your cat is naturally calm—after a meal or play session works well. Choose a well-lit, comfortable area with minimal distractions. Let your cat explore the supplies first to reduce anxiety.
Step 2: Position Your Cat Comfortably
Sit on the floor or couch with your cat on your lap or beside you. Gently wrap your cat in a towel if they’re squirmy, leaving only the head exposed. Speak in soothing tones throughout the process.
Step 3: Examine the Ears
Before applying any solution, use your flashlight to inspect the ear. Healthy ears appear pale pink with minimal wax buildup. Look for redness, excessive dark debris (possible ear mites), foul odor, or discharge—these signs warrant a veterinary visit before cleaning.
Step 4: Apply the Ear Cleaning Solution
Gently lift the ear flap and hold the bottle of cleaning solution close to (but not touching) the ear opening. Squeeze the recommended amount directly into the ear canal—typically 5-10 drops or as directed on the product label.
Step 5: Massage the Ear Base
With the ear flap still lifted, gently massage the base of the ear (the area where the ear meets the head) for 20-30 seconds. You should hear a squishing sound as the solution breaks up debris and wax. This step is crucial for effective cleaning.
Step 6: Allow Your Cat to Shake
Release your cat and let them shake their head vigorously. This natural response helps dislodge debris from deep within the ear canal. Have your towel ready to catch any flying solution!
Step 7: Wipe Away Debris
Using a cotton ball or gauze pad, gently wipe the visible portions of the inner ear and ear flap. Work from the inside out, using fresh cotton for each wipe. Never insert anything into the ear canal itself—clean only what you can see.
Step 8: Reward Immediately
Offer treats, praise, and affection immediately after completing one ear. This positive reinforcement makes future sessions easier. Repeat the process for the second ear.
Health Benefits / Cat Advantages
Regular ear cleaning provides numerous health advantages for your feline friend:
Infection Prevention: Studies show that routine ear maintenance can reduce ear infections by up to 60% in susceptible cats, particularly those with allergies or folded ears.
Early Problem Detection: Weekly ear checks allow you to spot issues like ear mites, yeast infections, or polyps before they become serious, potentially saving hundreds in veterinary costs.
Improved Comfort and Behavior: Cats with clean, healthy ears are less likely to scratch excessively, shake their heads constantly, or display irritability from discomfort.
Better Hearing: Excessive wax buildup can muffle sounds. Clean ears ensure your cat can respond appropriately to environmental cues and your voice commands.
Reduced Allergic Reactions: For cats with environmental allergies, regular cleaning removes pollen and allergens that accumulate in the ear canal, reducing overall allergic burden.
Bonding Opportunity: When done gently, ear cleaning strengthens trust between you and your cat, improving your overall relationship and making other care routines easier.
Alternative Methods & Tips
For Small Living Spaces: If you lack a dedicated grooming area, your bathroom provides a confined, easy-to-clean space. Close the door to prevent escape and place a non-slip mat on the floor.
Multi-Cat Households: Clean ears separately to avoid spreading infections. Sanitize your hands between cats and use fresh supplies for each animal.
For Anxious or Aggressive Cats: Consider using Feliway or similar pheromone diffusers 30 minutes before cleaning. Break the process into smaller sessions over several days—one ear per day if necessary.
Low-Cost Alternatives: While never skipping veterinary-approved solution, you can reduce costs by purchasing larger bottles and reusing soft washcloths (properly laundered) instead of disposable cotton balls.
Age-Specific Approaches: Kittens should be introduced to ear handling early (around 8-10 weeks) with gentle touches and treats, even before actual cleaning is necessary. Senior cats may need extra cushioning and patience due to arthritis.
Climate Considerations: In humid environments, check ears more frequently as moisture encourages yeast growth. In dry climates, you might need less frequent cleaning but watch for excessive flaking.
Common Mistakes to Avoid
Using Cotton Swabs: Q-tips can push debris deeper, pack wax against the eardrum, or cause injury. Stick to cotton balls and gauze for the outer ear only.
Cleaning Too Frequently: Over-cleaning strips natural protective oils and can cause irritation. Unless directed by a vet, every 2-4 weeks is sufficient for healthy cats.
Using Inappropriate Solutions: Household items like rubbing alcohol, vinegar, or witch hazel can burn, irritate, or damage ear tissue. Always use veterinary-formulated products.
Skipping the Massage Step: Simply squirting solution without massaging fails to break up debris effectively, wasting product and effort.
Ignoring Warning Signs: Attempting to clean ears that show signs of infection (redness, swelling, discharge, odor) can worsen the condition. These require professional diagnosis and treatment.
Forcing an Unwilling Cat: Aggressive restraint creates negative associations and can result in injury to you or your cat. If your cat is extremely resistant, seek help from a professional groomer or veterinary technician.
Not Rewarding Progress: Failing to provide positive reinforcement makes future sessions increasingly difficult. Every small success deserves a treat!
Storage & Maintenance Tips
Ear Cleaning Solution Storage: Keep bottles tightly sealed in a cool, dry place away from direct sunlight. Check expiration dates—expired solutions lose effectiveness and may harbor bacteria.
Supply Organization: Store all ear cleaning supplies together in a dedicated container or drawer. This makes the process quicker and ensures you don’t forget essential items.
Cotton Ball Freshness: Keep cotton balls in their original packaging or a sealed container to prevent dust accumulation and contamination.
Weekly Ear Checks: Even if not cleaning, examine your cat’s ears weekly during regular petting sessions. This early vigilance catches problems before they escalate.
Post-Cleaning Sanitation: Wash your hands thoroughly after each session. If using reusable towels, launder them in hot water with unscented detergent.
Seasonal Deep Cleaning: Every three months, inspect all your grooming supplies. Replace any cotton balls that seem dusty, discard solutions nearing expiration, and sanitize your supply container.
Record Keeping: Maintain a simple log noting cleaning dates and any observations. This helps you track patterns and provides valuable information for your veterinarian if problems arise.
Conclusion
Mastering the art of safe ear cleaning is an essential skill for every cat owner committed to their pet’s long-term health and comfort. By following this step-by-step guide, gathering the proper supplies, and avoiding common pitfalls, you can transform what seems like a daunting task into a manageable routine that strengthens your bond with your feline companion. Remember that consistency, patience, and positive reinforcement are your greatest tools. Start slowly, celebrate small victories, and never hesitate to consult your veterinarian if you notice anything unusual.
FAQs
How often should I clean my cat’s ears?
For most healthy cats, cleaning ears every 2-4 weeks is sufficient. However, cats with chronic ear issues, allergies, or certain breeds with folded ears (like Scottish Folds) may need weekly cleanings as recommended by your veterinarian. Always check ears weekly even if not cleaning.
What does healthy cat ear wax look like?
Normal cat ear wax is light brown to golden in color with a slightly waxy texture and minimal odor. Dark, coffee-ground-like debris suggests ear mites, while red, inflamed skin or foul-smelling discharge indicates infection requiring veterinary attention.
Can I use baby wipes or water to clean my cat’s ears?
No. Baby wipes contain chemicals and fragrances that can irritate the sensitive ear canal, while plain water doesn’t effectively break down wax and can introduce moisture that promotes bacterial growth. Always use veterinary-approved ear cleaning solutions specifically formulated for cats.
My cat absolutely refuses ear cleaning—what should I do?
Start with desensitization: touch the ears briefly during petting sessions with immediate treat rewards. Gradually increase handling time over several weeks before attempting actual cleaning. If resistance continues, consult your veterinarian about sedation for necessary cleanings or professional grooming services.
When should I see a vet instead of cleaning at home?
Schedule a veterinary visit if you notice redness, swelling, excessive discharge, bleeding, foul odor, constant head shaking, balance problems, or if your cat cries when you touch their ears. These symptoms indicate conditions requiring professional diagnosis and treatment rather than routine home cleaning.